Care & Maintenance
SHARPENING SURGERIES & SERVICES
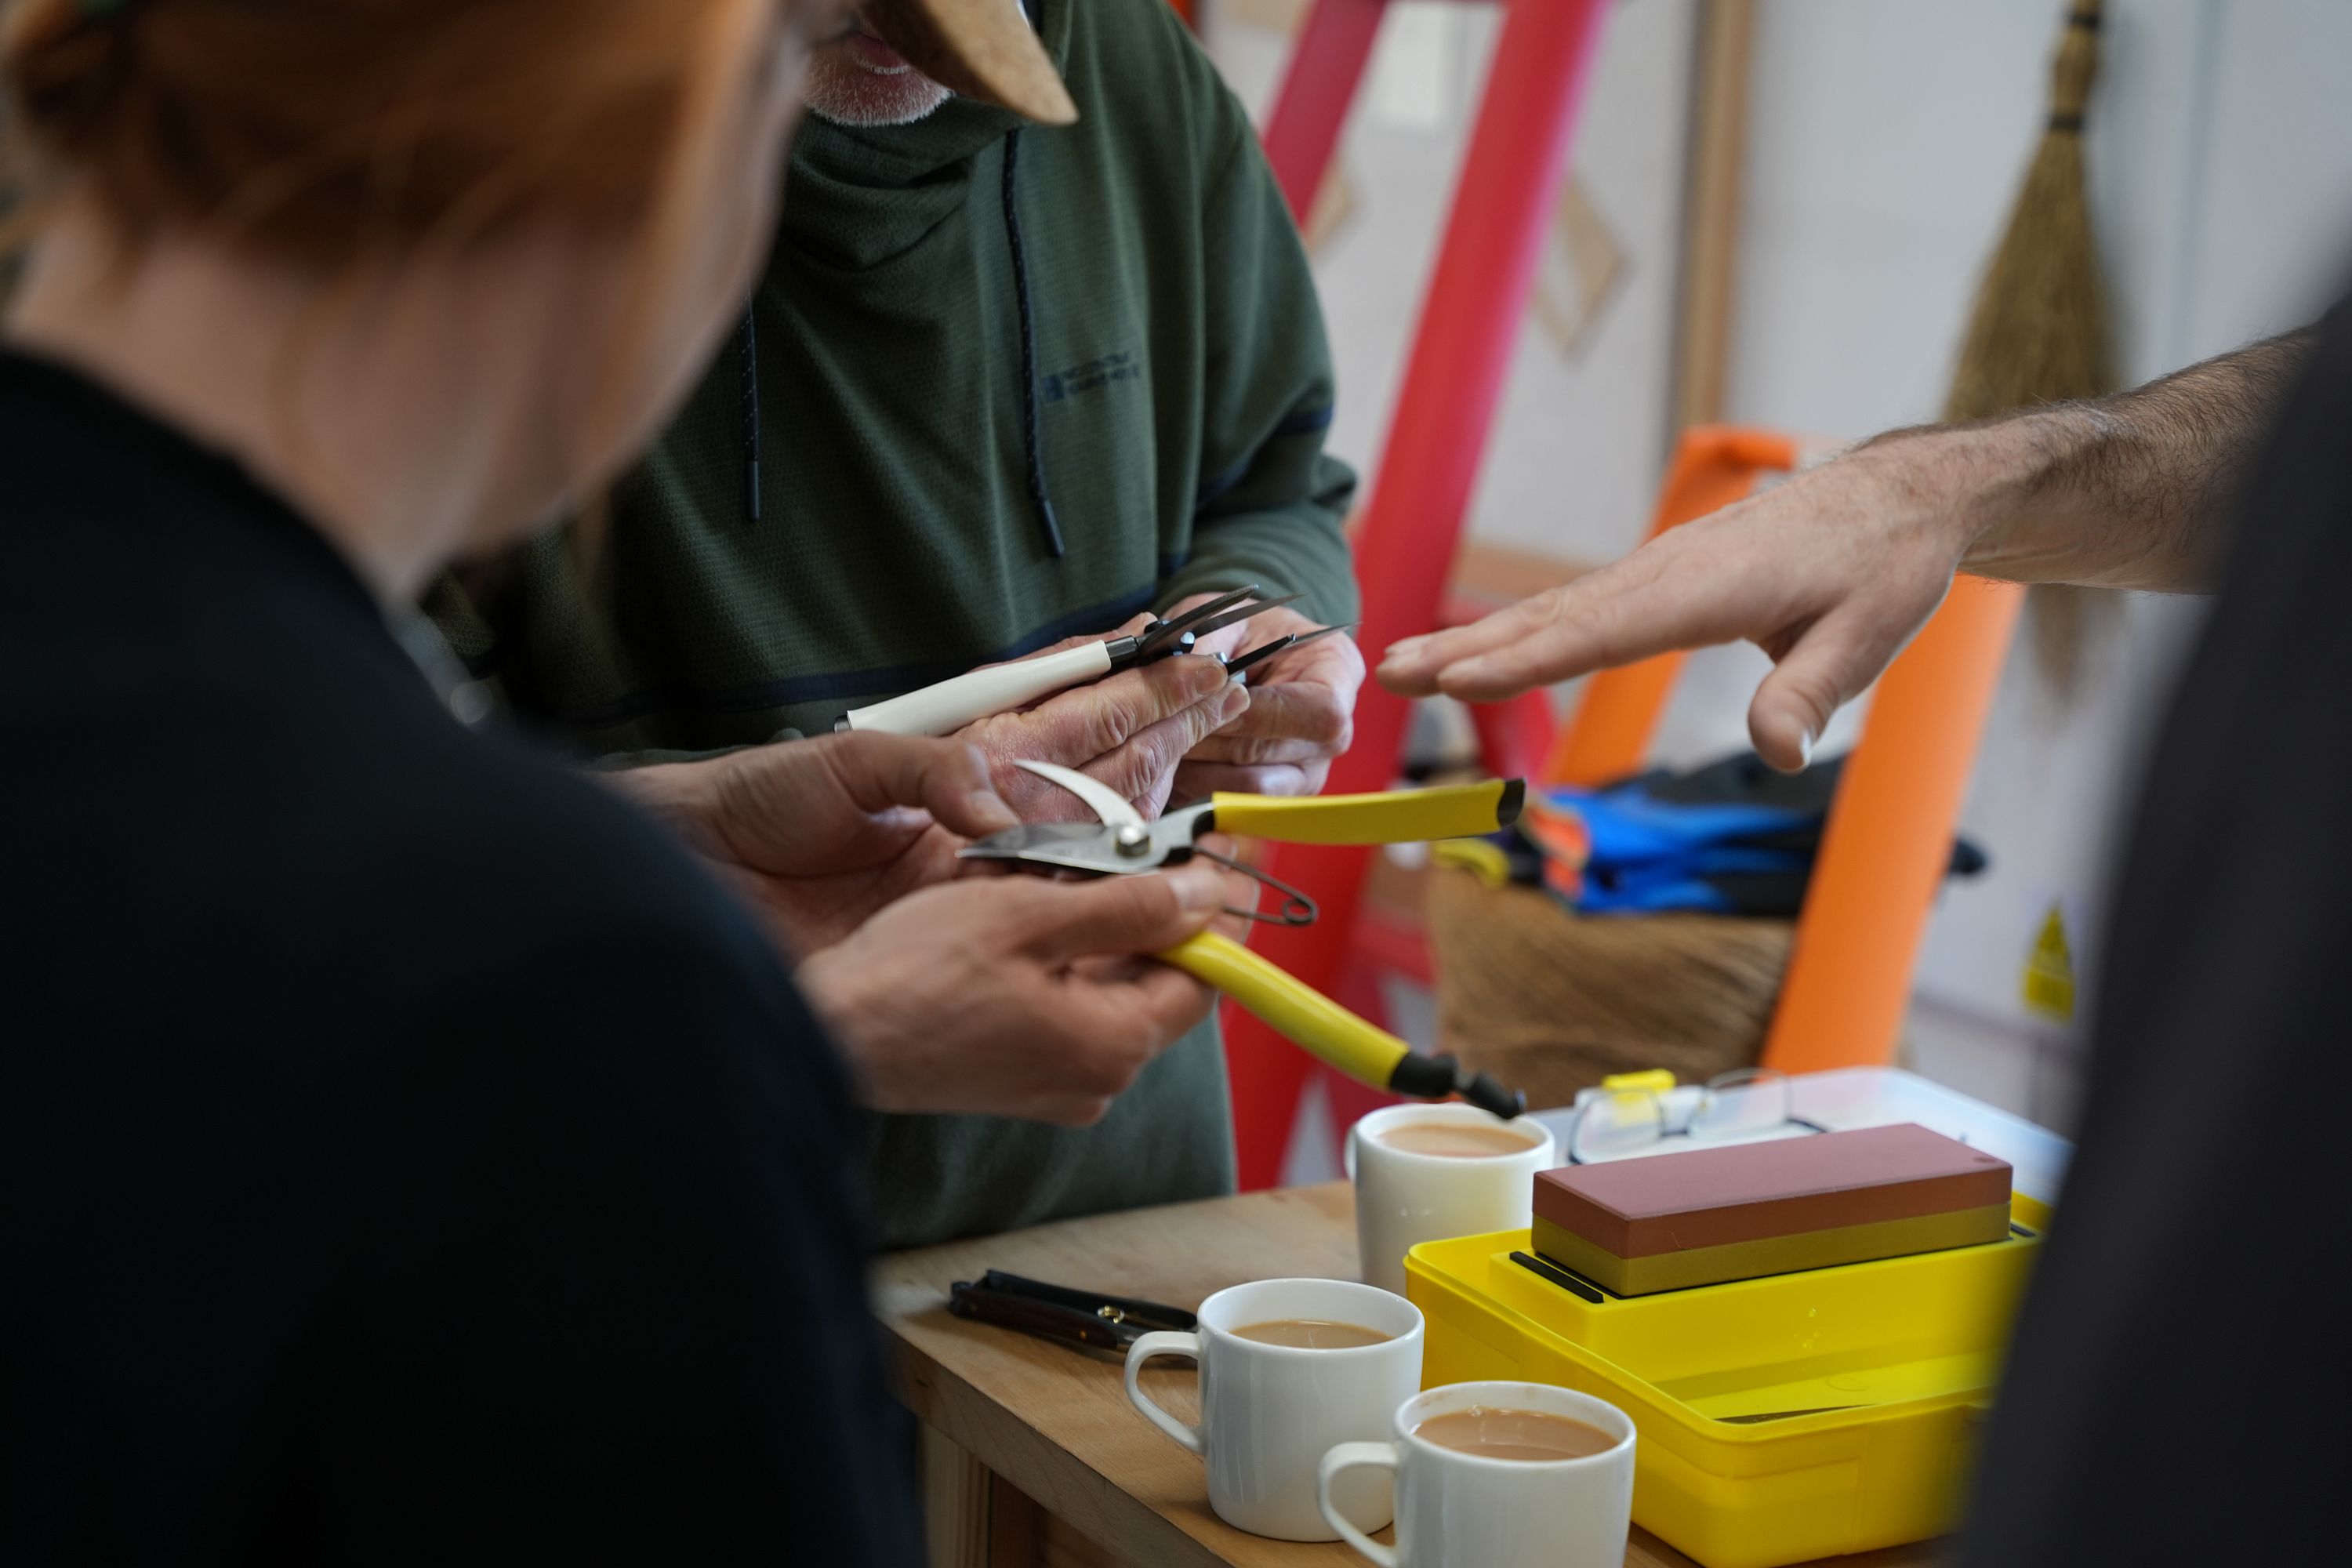
Niwaki Sharpening Surgeries
Niwaki Sharpening Surgeries
Brush up on your tool-care skills at our monthly Sharpening Surgeries. These sessions are free to attend, with no booking required. Niwaki products only please (one per customer).
February – December 2026
Niwaki London Store, No. 38 Chiltern Street:
Wednesdays, 13:00-15:00
6 May, 3 June, 1 July, 5 August, 2 September, 7 October, 4 November, 2 December
Niwaki Flagship Store, Chaldicott Barns, Semley:
Fridays, 12:00-14:00
1 May, 5 June, 3 July, 7 August, 4 September, 2 October, 6 November, 4 December

Niwaki tool sharpening service
Niwaki tool sharpening service
Niwaki offer a sharpening service for all tools supplied by us (except saws – sorry). How it works: you send the tool to us – ideally using a tracked service such as Royal Mail Recorded Delivery – and we do the work, then we send them back, via our courier. Simple.
Depending on how busy we are, it can take up to three weeks. If we feel the blades are beyond saving, we let you know. If you suspect they’re beyond saving please get in touch before you send them, and we can advise. Our friendly team knows what they’re talking about and are ready to help so don’t be afraid to pick up the phone or drop us an email (a photo or video is often a good idea). We don’t judge, even if you’ve done something really silly with them.

Niwaki knife sharpening service
Niwaki knife sharpening service
We also offer a sharpening service for all Niwaki kitchen knives. We use Shapton whetstones for the best finish possible, and finish off with a coat of camellia oil. Chips and nicks can be ironed out, but inevitably it changes the line of the blade. It only works for carbon steel blades, so don’t try sneaking any cheapo stainless steel knives in - you’re on your own with them.
HOW & WHY TO DO IT YOURSELF
Keeping your tools clean
Before you can sharpen your tools, you need to clean them up, which is a job for a Niwaki Clean Mate: effectively a rust and sap eraser.
Keep a pot of water handy to wet the Clean Mate, then rub away any rust, sap, gunk and goo that has made its home on your secateurs, shears or knife. You can even use it on your Hori Hori, but it might be better to brush away mud and dirt with a wire brush or similar first.
Keep wetting the Clean Mate and working away at the blades, wiping away the resulting mush with a damp rag. Be aware, the Clean Mate is abrasive and will dull the fine finish on highly polished tools like the Kurumi Secateurs.
If you’re working on shears, it makes sense to wrap the blade you’re not working on in an old rag to protect your knuckles.
Once you’ve cleaned off the sap and rust, you might like to disinfect your tools to prevent the transfer of pathogens between plants and even gardens (if you’re a professional). Although we don’t sell disinfectant or isopropyl alcohol we do supply some very fine galvanized buckets.
How and why to care for your Niwaki tools
We’ll answer the ‘why’ bit first: clean, sharp tools are easier to use, healthier for your plants (causing less damage and avoiding contamination), and, crucially, they last longer. Perhaps even longer than you if you care for them correctly. Those Yamakawa Secateurs could become an heirloom one day … but we digress.
The how bit takes a little longer to explain, but we’ve broken it down into the responsible gardener’s mantra: keep ‘em clean, keep ‘em sharp, keep ‘em protected. Let’s see what that means in practice.
Sharpening your tools at home
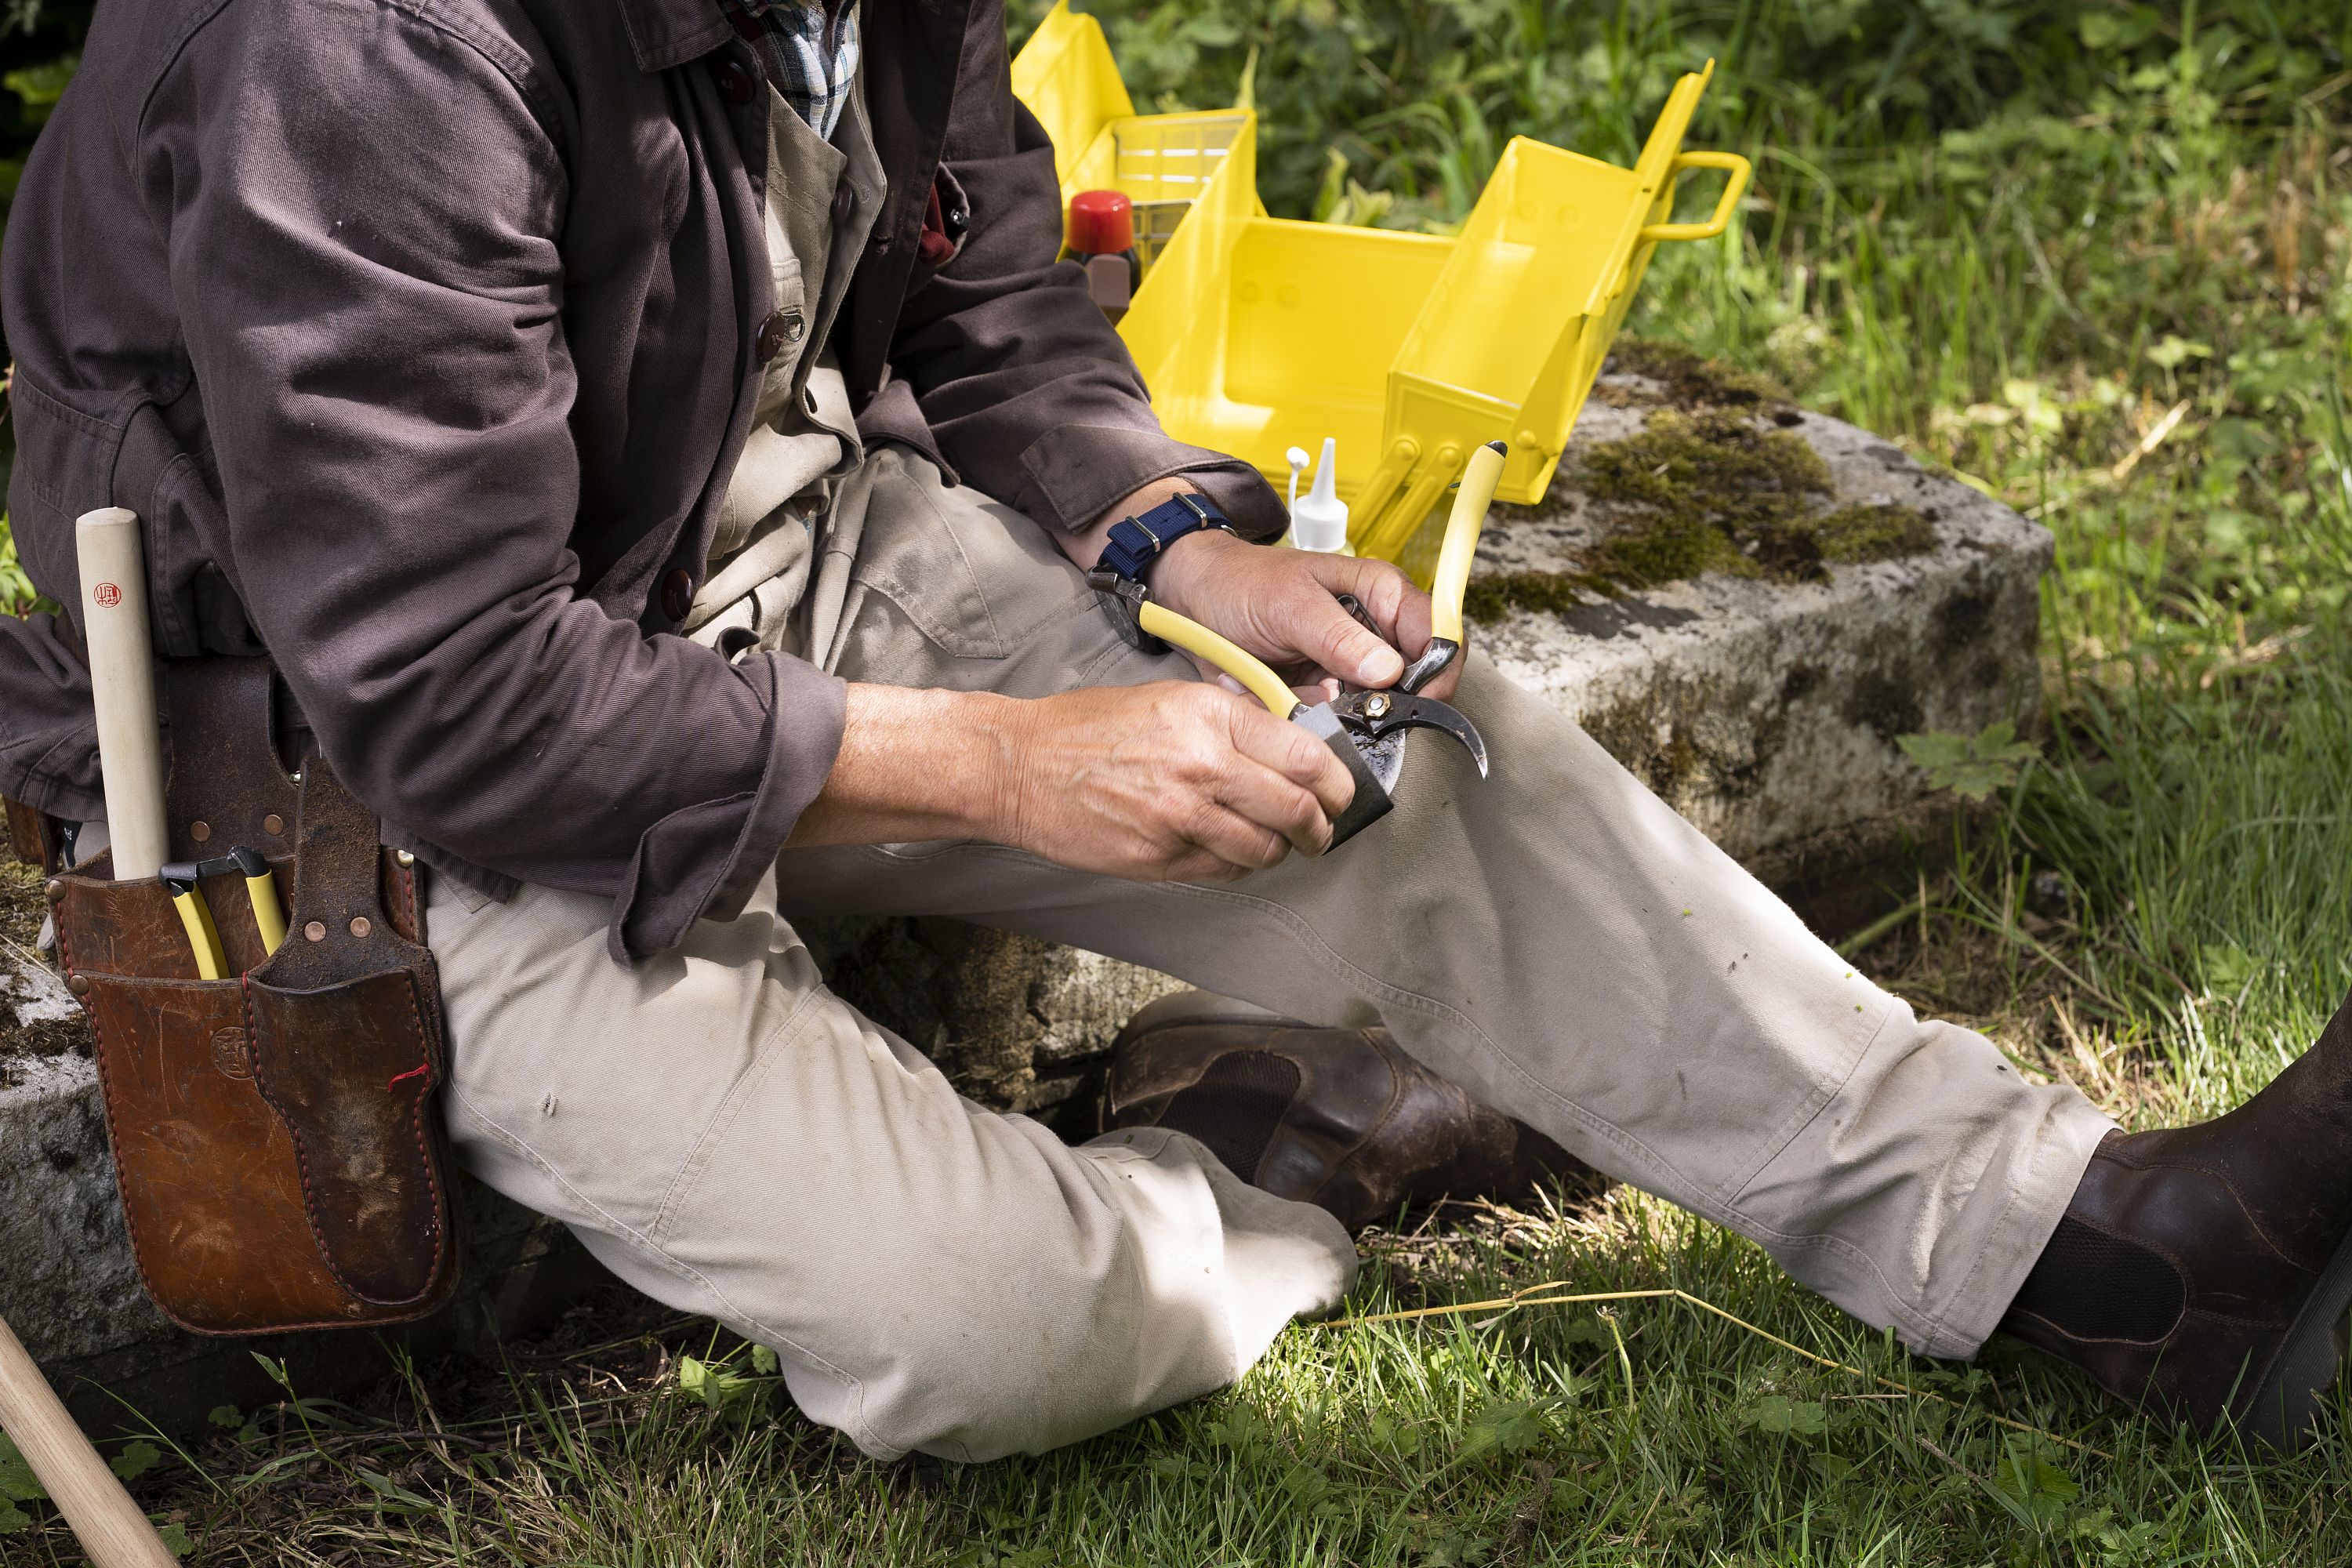
Let’s begin with secateurs. All our secateurs are bypass secateurs, which means they have one blade which slides very closely across the top of the ‘bypass’ ie the other side, which is very definitely not a blade! It is very important that you do not sharpen or alter the shape of the bypass in any way, so keep your sharpening stone away from it.
Inspect your secateurs. If there are any nicks in the blade, consider working on it with a Twin Diamond File to begin smoothing it out. Use the file sparingly – you don’t want to change the shape or angle of the blade if you can avoid it, but you can smooth off any major burrs or defects in the cutting edge.
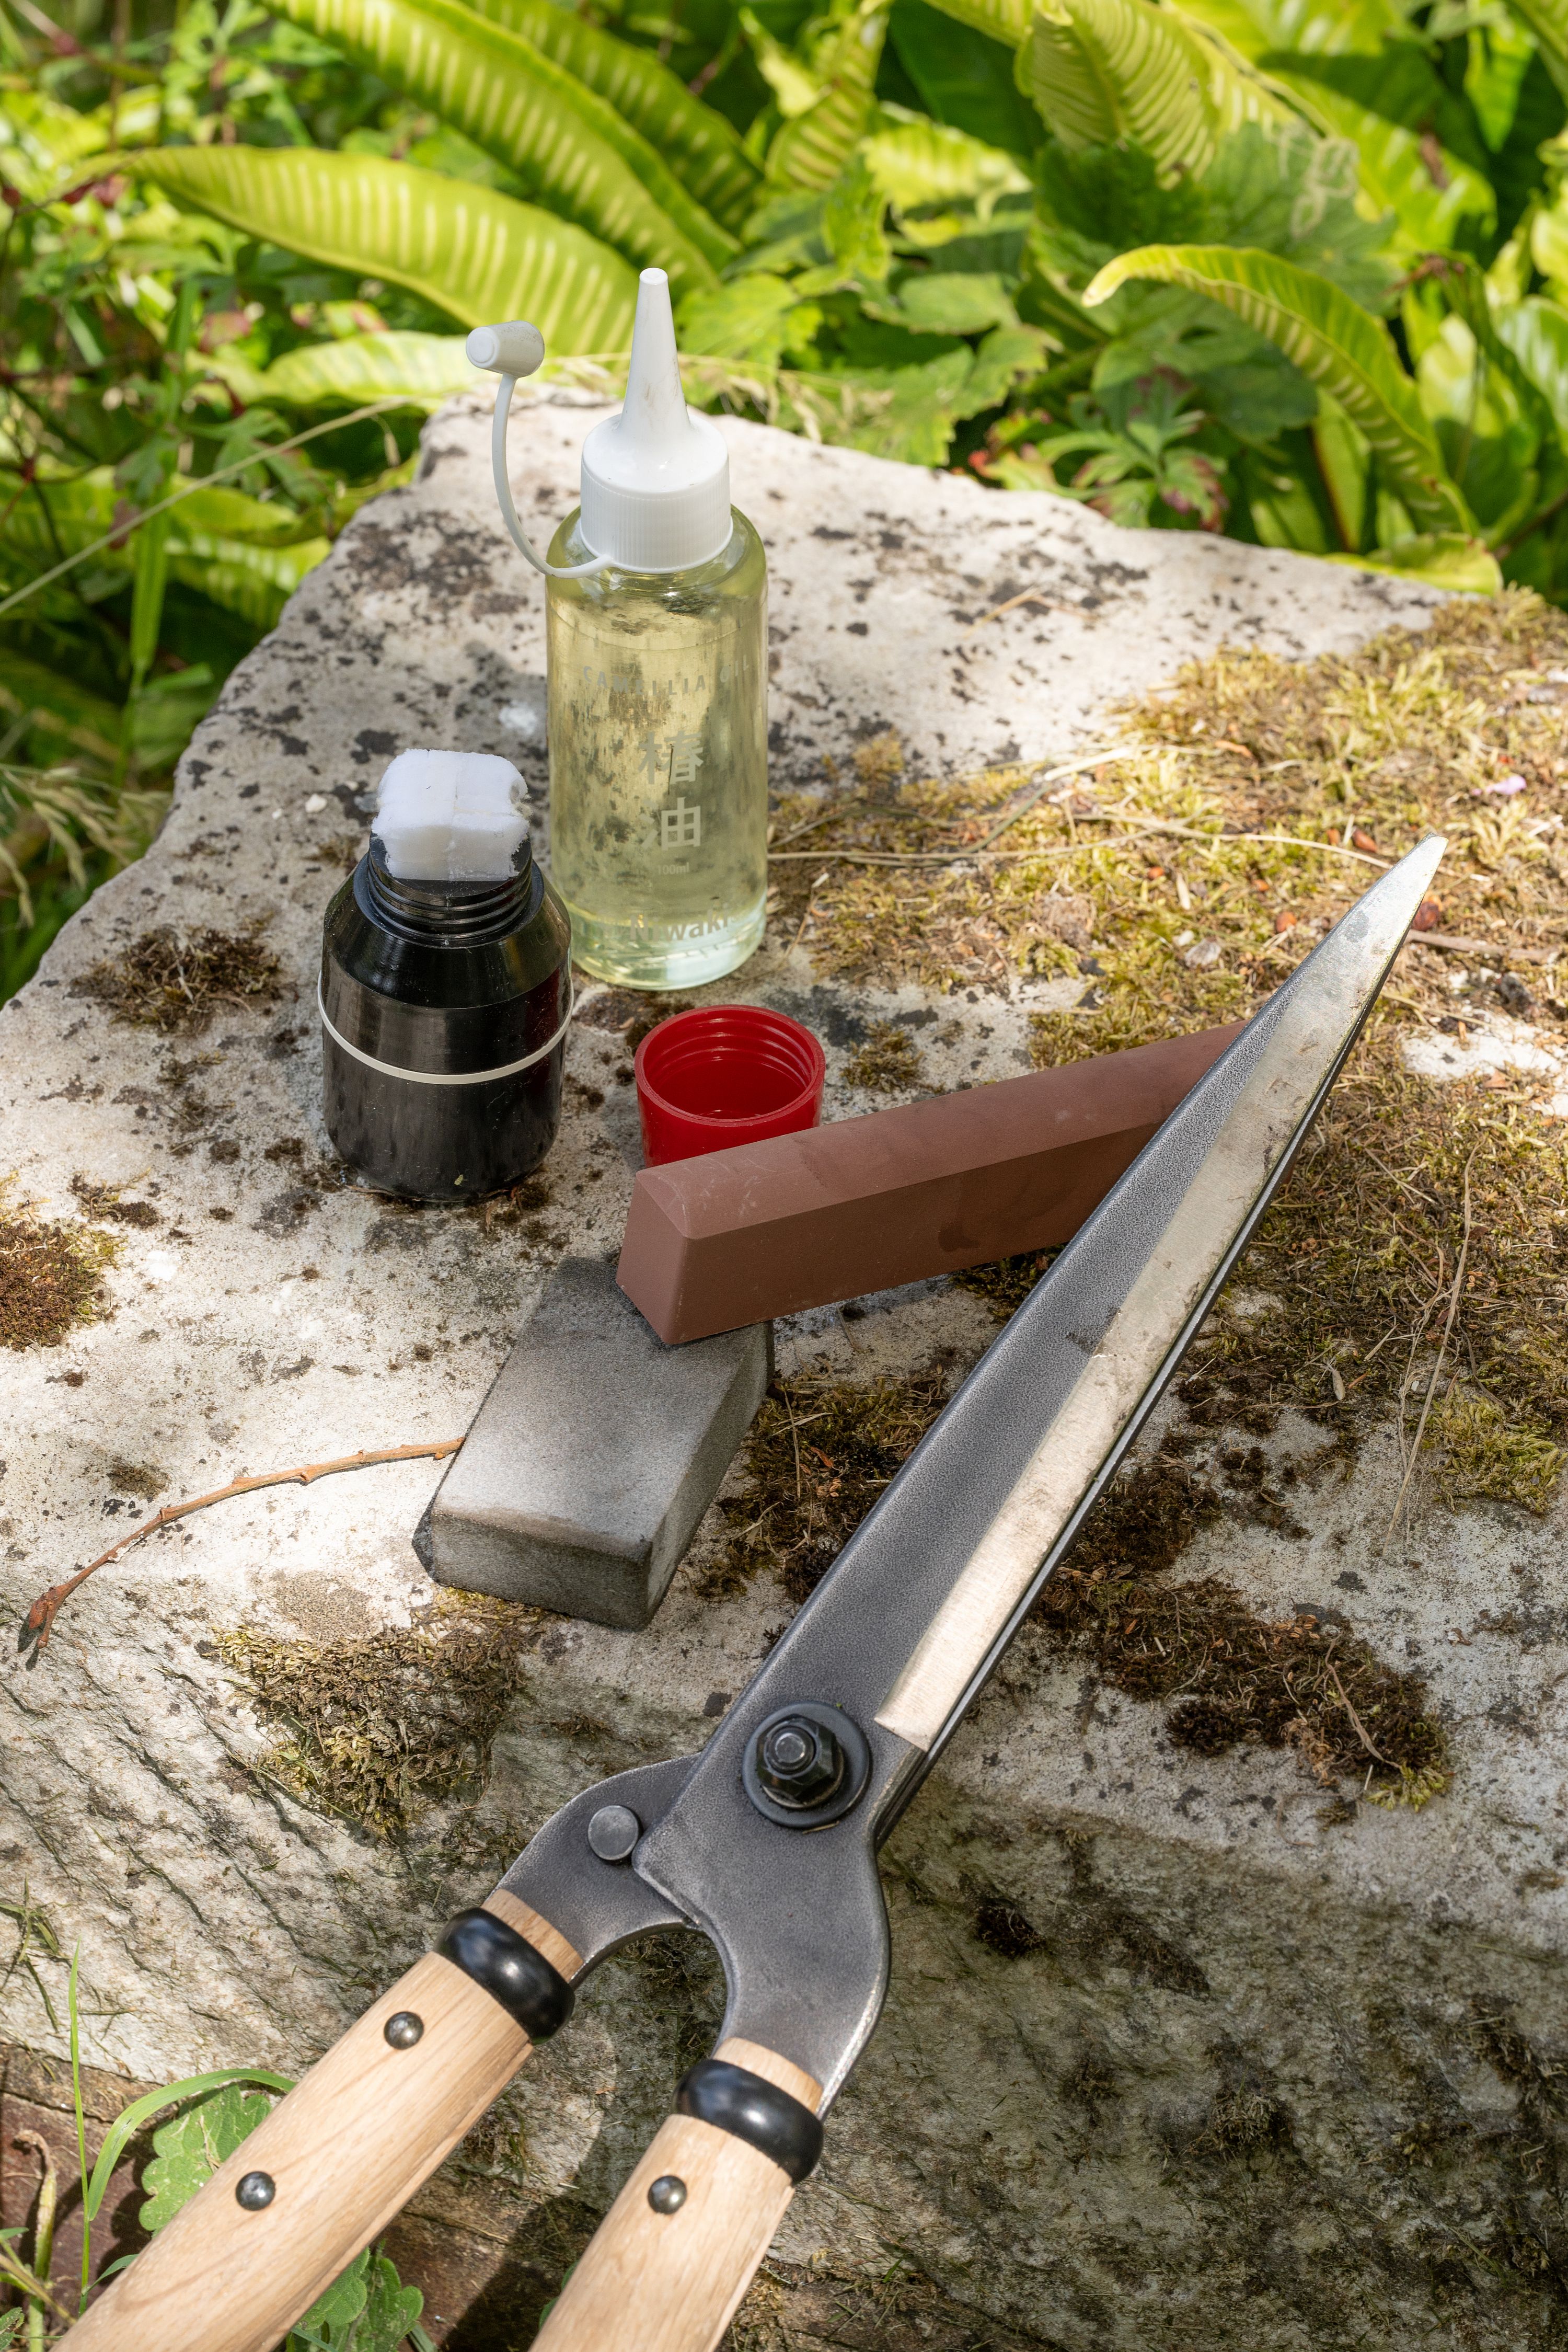
Next up, it’s time for the Niwaki Sharpening Stone, which you will need to soak in water for a few minutes (it’s ready when the bubbles stop). We sell three ‘grits’ of sharpening stone: the lower the number, the rougher the stone. For most people, the #1000 grit stone (the dark brown one) is the right choice, but you could start with a #220 (rough) and finish off with a #3000 (the least rough) if you’re a perfectionist.
Watch one of the videos below to see the exact technique, but effectively you want to fit the concave side of the sharpening stone against the convex outer/top side of the blade, and sharpen with a sweeping motion at an angle of 15 degrees or so. It sounds harder than it is, but watch Jake in action and you’ll get the idea. Do this 10-20 times, making care to work the entire length of the blade, then flip them over to show the flat, inner side of the blade. This side doesn’t need sharpening, but you do want to rub the flat side of the sharpening stone along it once or twice just to remove any burr that has formed. Then try cutting a bit of paper and marvel at what you have achieved!
For shears and other straight-edged, scissor-like tools you’ll need to use the flat edge of the sharpening stone, only working on the outside faces of the blades. The inside faces (ie the faces of the blade that are hidden when the shears are closed) will just need one pass with the flat of the stone to remove the burr. Again, refer to the video below where Jake walks you through step by step.
Apply Camellia Oil (but never WD-40, bike oil, olive oil or any other lubricants you have lying about) directly from the bottle or from an Oil Dispenser (which works like a fat felt-tip pen filled with oil). Wipe off any excess and admire your clean, sharp and now protected tools.

How-to videos

Sharpening Niwaki Secateurs with Niwaki Stones and Twin Diamond File

SHARPEN YOUR SHEARS WITH JAKE

Sharpening Japanese Kitchen Knives with Shapton Glass Series Stones
Cleaning & protecting products

Camellia Oil

Oil Dispenser

Mini Clean Mate

Niwaki Galvanised Bucket • Large 11L
Sharpening products

Niwaki Sharpening Tools Bundle • Sharpening Stone + Twin Diamond File + Camellia Oil + Mini Clean Mate

Niwaki Combination Stone #1000/3000

Niwaki Sharpening Stone • #1000

Niwaki Twin Diamond File
Contact customer services
Our team have all been trained in the art of sharpening and caring for tools, so please do get in touch if you have reached the end of this page, watched all the videos and are still at a loss what to do. If you’re near Niwaki HQ or Niwaki Chiltern Street, you can bring your tools in to us and we’ll advise what’s needed, or else get in touch via this contact form: